Case of the missing bun….

Men. Sometimes they just aren’t thinking. Case in point, the Daring Bakers challenge. This time around Marce from Pip in the City chose have us make cinnamon rolls. My husband was very excited about this. His is a pretty picky guy, but he loves him some cinnamon rolls. We were given the freedom to use different spices but nothing was said about nuts and fruit. Well, we like both nuts and raisins in our rolls. So when I made them I made all raisin and nut ones, except for one. I went to bed and when I woke up the ONE plain cinnamon roll was gone. I asked my husband if he ate it(of course he did unless we had some cinnamon roll thief) and he said yes. I asked him WHY he ate the plain one when I made raisin pecan ones. His answer was they all looked the same. Grrrr.
So needless to say, I am the rebel Daring Baker this month and did not follow the rules…at least not in my photos. This was an excellent recipe and the dough is truly outstanding….and I hardly say that about a Daring Baker challenge. I encourage everyone to try it even if you have a cinnamon roll that you like to eat. I thought I had one I loved, but it got replaced by this recipe now. I chose to use half shortening and half butter and I think that really helped with the texture. As much as I usually don’t like shortening, it really works nicely here.
Check out all the other Daring Bakers buns
by visiting the DB blogroll.

Cinnamon Buns
Ingredients:
6 1/2 tablespoons (3.25 ounces) granulated sugar
1 teaspoon salt
5 1/2 tablespoons (2.75 ounces) shortening or unsalted butter(I used 3 TBSP shortening and 2 1/2 TBSP butter)
1 large egg, slightly beaten
1 teaspoon grated lemon zest
3 1/2 cups (16 ounces) unbleached bread
2 teaspoons instant yeast*
1 1/8 to 1 1/4 cups whole milk, at room temperature
1/2 cup cinnamon sugar (6 1/2 tablespoons granulated sugar plus 1 1/2 teaspoons ground cinnamon, or any other spices you want to use, cardamom, ginger, allspice, etc.)
White fondant glaze(recipe follows)
Instant yeast contains about 25% more living cells per spoonful than active dry yeast, regardless of the brand. Instant yeast is also called rapid-rise or fast-rising.

Cream together the sugar, salt, and shortening or butter on medium-high speed in an electric mixer with a paddle attachment (or use a large metal spoon and mixing bowl and do it by hand); if you are using powdered milk, cream the milk with the sugar, and add the water with the flour and yeast. Whip in the egg and lemon extract/zest until smooth. Then add the flour, yeast, and milk. Mix on low speed (or stir by hand) until the dough forms a ball. Switch to the dough hook and increase the speed to medium, mixing for approximately 10 minutes (or knead by hand for 12 to 15 minutes), or until the dough is silky and supple, tacky but not sticky. You may have to add a little flour or water while mixing to achieve this texture. Lightly oil a large bowl and transfer the dough to the bowl, rolling it around to coat it with oil. Cover the bowl with plastic wrap.
Ferment at room temperature for approximately 2 hours, or until the dough doubles in size.
Mist the counter with spray oil and transfer the dough to the counter.
(A) Roll out the dough with a rolling pin, lightly dusting the top with flour to keep it from sticking to the pin. Roll it into a rectangle about 2/3 inch thick and 14 inches wide by 12 inches long for larger buns, or 18 inches wide by 9 inches long for smaller buns. Don´t roll out the dough too thin, or the finished buns will be tough and chewy rather than soft and plump. (B)Sprinkle the cinnamon sugar over the surface of the dough and (C) roll the dough up into a cigar-shaped log, creating a cinnamon-sugar spiral as you roll. With the seam side down, cut the dough into 8 to 12 pieces each about 1 3/4 inches thick for larger buns, or 12 to 16 pieces each 1 1/4 inch thick for smaller buns.)
Line 1 or more sheet pans with baking parchment. Place the buns approximately 1/2 inch apart so that they aren´t touching but are close to one another.
Proof at room temperature for 75 to 90 minutes, or until the pieces have grown into one another and have nearly doubled in size. You may also retard the shaped buns in the refrigerator for up to 2 days, pulling the pans out of the refrigerator 3 to 4 hours before baking to allow the dough to proof.
Preheat the oven to 350°F (175°C) with the oven rack in the middle shelf.
Bake the cinnamon buns for 20 to 30 minutes or the sticky buns 30 to 40 minutes, or until golden brown. If you are baking sticky buns, remember that they are really upside down (regular cinnamon buns are baked right side up), so the heat has to penetrate through the pan and into the glaze to caramelize it. The tops will become the bottoms, so they may appear dark and done, but the real key is whether the underside is fully baked. It takes practice to know just when to pull the buns out of the oven.
Cool the buns in the pan for about 10 minutes and then streak white fondant glaze across the tops, while the buns are warm but not too hot. Remove the buns from the pans and place them on a cooling rack. Wait for at least 20 minutes before serving.
White fondant glaze:
Cinnamon buns are usually topped with a thick white glaze called fondant. There are many ways to make fondant glaze, but here is a delicious and simple version, enlivened by the addition of citrus flavor, either lemon or orange. You can also substitute vanilla extract or rum extract, or simply make the glaze without any flavorings.
Sift 4 cups of powdered sugar into a bowl. Add 1 teaspoon of lemon or orange extract and 6 tablespoons to 1/2 cup of warm milk, briskly whisking until all the sugar is dissolved. Add the milk slowly and only as much as is needed to make a thick, smooth paste.
When the buns have cooled but are still warm, streak the glaze over them by dipping the tines of a fork or a whisk into the glaze and waving the fork or whisk over the tops. Or, form the streaks by dipping your fingers in the glaze and letting it drip off as you wave them over the tops of the buns. (Remember to wear latex gloves.)
Source: Adapted from The Break Baker´s Apprentice by Peter Reinhart


Men are from Mars…

Awhile ago there was a book that was pretty popular called Men Are From Mars, Women Are From Venus. Personally, I’m from planet Earth and I didn’t speak either of those languages. If you are wondering what the book was about, it was a relationship book basically saying that men and women are from different planets when it comes to expressing how they feel and how they love. Basically a crock of shit. But, it made the author very rich…good for him.
When I saw this recipe I thought, maybe I should move to Mars because these sounded wonderful! They are a take on the Southern treat called Moon Pies(which I have never had but would like to). The traditional kind are sandwich cookies and these are more open faced. You could however make these into a sandwich cookie if you would like. I really love the use of the graham flour as it gives the cookie that graham cracker taste. I made smaller ones(shocking) than what the recipe called for and they turned out great. The marshmallow is wonderful and I plan to use it in a cake someday. And I already used the chocolate-caramel ganache in my Bailey’s cake so there are many ways to use the different components of these cookies.
If this is an indication of what life is like on Mars, maybe I really should move there.

Mars Pies
Cookies
Chocolate-Caramel Ganache
Chocolate-Marshmallow Filling
Chocolate Coating
All recipes follow
Cookies
1 cup unsalted butter, at room temperature
½ cup powdered sugar
1 cup all-purpose flour
1 cup whole-grain graham flour
¼ tsp salt
½ tsp baking powder
1 tsp vanilla extract
Preheat oven to 350F.
Grease baking sheet or line with parchment paper.
Cream butter and sugar together, about 3 minutes until fluffy.
Add both flours, salt, baking powder and vanilla. Beat on medium speed until thoroughly incorporated.
Roll dough out to ¼ inch thickness on a lightly floured flat surface.
Using a 3 ½ inch diameter cookie cutter, cut out six cookies(I used just a small biscuit cutters since I wanted mine smaller and got 14 cookies).
Transfer to the prepared baking sheet and bake 10-12 minutes or until golden brown. Cool the cookies completely on racks before covering with ganache.
Chocolate-Caramel Ganache
10 ounces bittersweet chocolate, finely chopped
1 cup heavy whipping cream
10 caramel candies, unwrapped
Place the chocolate in a medium bowl. Heat the cream and caramels over medium-low heat, stirring occasionally, until the caramels have melted completely. Pour the hot mixture over the chocolate and stir until melted.
Chocolate Marshmallow Filling
1 ½ envelopes unflavored gelatin
1 cup cold water
1 ½ cups sugar
1 cup light corn syrup
1/8 tsp salt
6 TBSP unsweetened cocoa powder
Using a mixer fitted with a whisk attachment, whit the gelatin into ½ cup of the cold water.
In a medium saucepan, heat the sugar, corn syrup, remaining ½ cup of cold water, and salt with out stirring until it reaches the soft-ball stage, registering 234 to 240F on a candy thermometer.
Add the warm sugar mixture to the gelatin mixture in a slow, thin stream, stirring continuously on low speed. Increase to high speed and beat about 5 minutes, until the mixture has thickened and cooled. Reduce the speed to low, add the cocoa powder 1 TBSP at a time, and beat until incorporated.
Chocolate Coating
8 ounces bittersweet chocolate, coarsely chopped
Microwave the chocolate in a bowl for 1 minutes on medium-high. Stir, and if the has not completely melted, keep microwaving for 30 second intervals. Stir until smooth.
To Assemble the Pies:
Place the cookies on a baking sheet covered with waxed paper, leaving about 2 inches between the cookies. Spread a ¼ inch-thick layer of ganache on top of each cookie and refrigerate about 10 minutes, until set. Spread a layer of marshmallow filling(about 2 TBSP) over the ganache, it will flow over the edges of the cookie. Spoon about 2 to 3 TBSP of the melted chocolate to cover each cookie completely. Refrigerate the cookie about 10 minutes, until the chocolate layer has hardened. Store in an airtight container with waxed paper between each layer.
Adapted from The Pastry Queen by Rebecca Rather with Alison Oresman

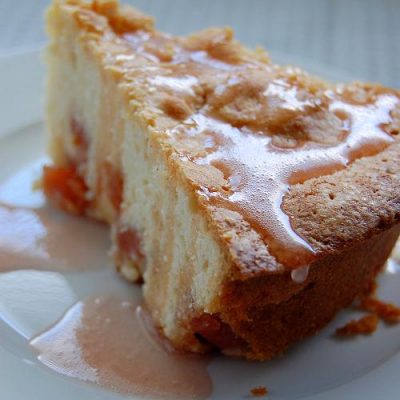
That’s what friends are for….

I am constantly amazed at how wonderful the food blogging community is. When I started my little blog a few years ago I had no idea it would open me up to “meeting” such phenomenal people. I use meeting in quotes because I have on really met a few of my fellow bloggers in person(though I am working on that!). One of those bloggers that I was lucky enough to encounter in real life was Elle, over at Feeding My Enthusiasms. We had a wonderful lunch together while she was in town visiting her daughter. It was around the time of my birthday and she spoiled me with gifts galore, everything from sea salt to chocolate to sourdough starter…a truly generous person. Well, her generosity did not stop there. A few weeks ago on her blog she had made some gorgeous quince jelly. I had made a comment on there how much I adored quince and how underrated a fruit it really was. I find that most people don’t even know what a quince is, which is such a shame. If you are one of those people go here, to learn all about the fruit of love.
Anyway, back to her generosity. Elle had asked me in an email if I would like some of those quinces from her back yard and I immediately jumped at the chance! So just a few days later there at the mailbox was my box of quinces. My husband was the one to get the box and when I caught up with him he told me, “I think your perfume spilled inside the box.” I just laughed and said, “that’s not perfume, that’s fruit.” You see the quince is a very fragrant fruit, in fact, my whole apartment smelled like quince for quite a few days. It smells even better when it is being cooked down.
What to do with them was another story. As much as I adore quince, I only have it out…usually in the form of quince paste along side my cheese platter. I knew I wanted to make a small batch of the jelly that Elle made but also wanted to do a baked good. I found a recipe for quince pound cake on Epicurious.com. It got 4 stars and so I decided to go for it. It is a two parter. The first being boiling down the fruit and the second being the making of the cake and then later on folding the quinces in. The recipe has you discard the juices that are left after you boil down the quinces but I could bring myself to throw it out. So I just added a little bit of powdered sugar to it to make a sauce to drizzle over it.
The one thing I did learn about the quince is that it is a sticky little sucker. It has so much natural pectin in it(so much you don’t add any to make the jam) that it seemed to stick everywhere. Even after washing my hands 5 times, I still had a little stick. I thought for awhile that I might just keep it on my hands and see if I could climb the walls like Spiderman….but something told me that would spell disaster. ![]()
Quinces are just coming into season. If you are lucky your grocery store might carry them(just don’t bother to ask the clerk where they are). I highly recommend getting to know this fruit if you do not.
Thanks again to you Elle for my great gift of quinces! You truly are such a lovely and generous woman!

Quince Pound Cake
2 medium quinces (about 1 pound total)
2 cups water
3/4 cup sugar
1/2 cup honey
2 teaspoons fresh lemon juice
1/2 teaspoon cinnamon
Peel, quarter, and core quinces. Cut quarters crosswise into 1/8-inch-thick slices. In a 3-quart heavy saucepan bring quince, water, sugar, honey, lemon juice, and cinnamon to a boil. Reduce heat and simmer mixture, stirring occasionally, 2 1/2 hours (quince will be deep pinkish orange). Drain quince in a large sieve and transfer to paper towels. Pat quince dry and cool. Chill quince, covered, at least 1 hour and up to 3 days.

1 3/4 cups cake flour (not self-rising)
1/4 teaspoon cinnamon
1/4 teaspoon salt
1 stick (1/2 cup) unsalted butter, softened
1 1/2 cups sugar
1 large egg yolk
3 whole large eggs
1/2 cup heavy cream
1 teaspoon vanilla
Preheat oven to 350°F. Butter and flour a 9- by 2-inch round cake pan, knocking out excess flour.
Into a bowl sift together twice flour, cinnamon, and salt. In another bowl with an electric mixer beat together butter and sugar until combined well. Add yolk and whole eggs, 1 at a time, to butter mixture, beating well after each addition. Beat in half of flour mixture and all of cream until just combined. Add remaining flour mixture and vanilla, beating until just combined. Fold quince slices into batter until combined well and spread batter evenly in pan.
Bake cake in middle of oven 1 1/4 hours, or until a tester comes out clean, and cool in pan on a rack 20 minutes. Turn cake out onto rack and cool completely. (Cake keeps, in an airtight container at room temperature, 4 days.)
Serves 10 to 12.
Source: Gourmet Magazine, January 1998

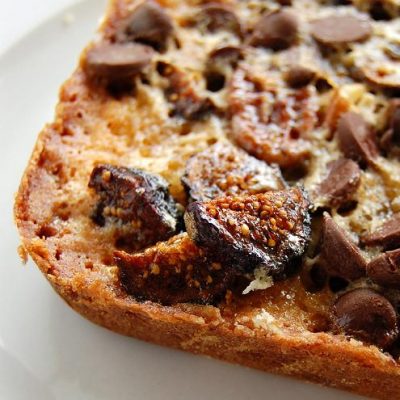
Gettin’ Figgy With It…. SHF #35
(((Hangs head in shame))) I can’t remember the last time I participated in Sugar High Friday(I fear it was all the way back when I made mini homemade Pop Tarts). But when I saw that my friend and fellow hockey lover Ivonne over at Cream Puffs in Venice was hosting, I had to step up and find the time to participate. She chose figs. I envisioned some glorious tart over flowing with fresh figs…that was until I went in search of them. No fresh figs at my Farmers Market or my go to produce store. Boo. Okay, plan B. Dried figs. Again, nothing at the Farmers Market and when I asked a worker at my go to store where were the dried figs…he said they didn’t carry them. I went to several grocery stores with no avail. I started to panic and had small nightmare flashes of me having to buy Fig Newtons and scrape out the filling and do something with that. Luckily, my brain got to thinking…maybe my go to store has them and the person I asked just didn’t know. That was pretty much the case. For there in the bulk section were dried figs galore. Grrrr. So I scooped them up, found the clerk I had asked the week before and promptly showed him what dried figs were and where they are in the store. “Oh” was all I got.
So my mission of getting figs was finally accomplished, but what to do with them? I found a website for the Valley Fig Growers that had a lovely selection of what to do with dried figs. I settled on these bars because they possessed all things I liked…. plus they looked easy to make and I needed that as I of course had it stuck in my head that SHF was the 28th, which of course it is, but your submissions are due on the 24th!
Needless to say, I made the deadline and you can too….if you hurry.

Chocolate-Fig Pecan Bars
Makes 32 bars
2 cups all-purpose flour
3/4 cup sugar, divided
10 tablespoons butter or margarine
1 package (8-ounce) Blue Ribbon Orchard Choice or Sun-Maid Mission or Calimyrna Figs, chopped
3/4 cup chopped pecans
2/3 cup semisweet chocolate morsels
3 large eggs
3/4 cup light corn syrup
1 teaspoon vanilla extract
Heat oven to 350°F. In medium bowl, stir together flour and 1/4 cup sugar. Add butter, cut into small pieces. With pastry blender or two knives, cut butter into dry ingredients until mixture resembles coarse crumbs. (Mixture will be dry.) Press crust in bottom of lightly greased 13-x-9-inch baking pan. Bake for 15 minutes or until edges begin to brown. Sprinkle figs, pecans and chocolate morsels over crust. Lightly beat eggs, gradually beat in remaining 1/2 cup sugar, corn syrup and vanilla until well blended. Pour over crust. Return to oven for 20 to 30 minutes or until filling is firm around edges and slightly soft at center. Cool on wire rack. Cut into bars.
Source: Valley Fig Growers


